My Leaves
Purpose:
The My Leaves section allows employees to view, manage, and apply for various types of leave. This module helps track available leave balances, leave history, and approval status — ensuring transparency and accuracy in attendance and leave management.
1. Overview
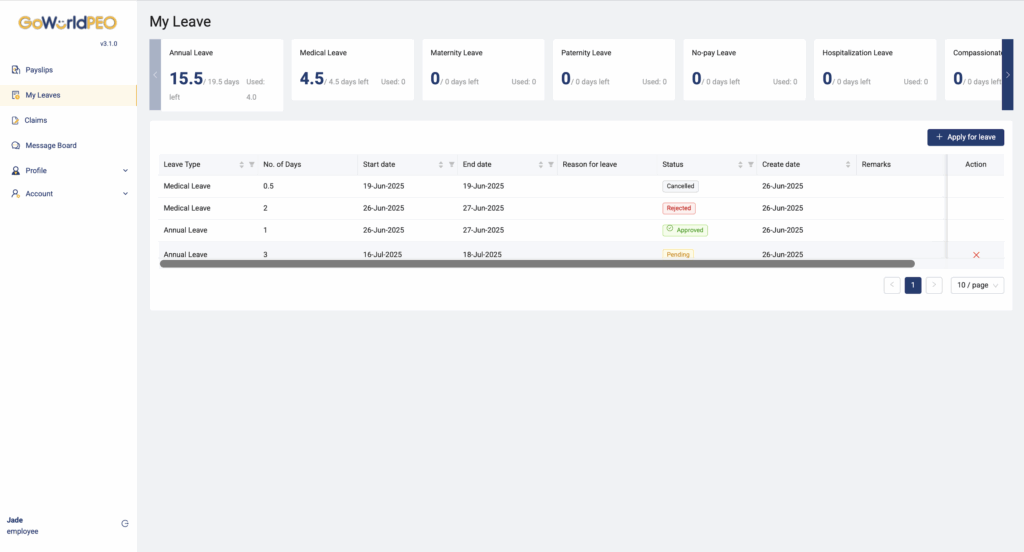
At the top of the page, you will see a Leave Summary Dashboard that displays your remaining and used leave balances for each type:
- Annual Leave – Displays total entitlement, used days, and balance left.
- Medical Leave – Shows total medical leave entitlement and remaining balance.
- Maternity Leave / Paternity Leave – Appears if applicable based on employment status.
- No-pay Leave, Hospitalisation Leave, Compassionate Leave, etc. – Show balances according to company policy.
Below the summary, a Leave History Table lists all leave requests with the following columns:
- Leave Type: Type of leave taken or applied for.
- No. of Days: Number of days requested.
- Start Date / End Date: Duration of the leave period.
- Reason for Leave: Notes provided during application.
- Status: Indicates if the leave is Pending, Approved, Rejected, or Cancelled.
- Create Date: The date the request was submitted.
- Remarks: Comments added by the HR or manager.
- Action: Allows users to cancel a pending request.
2. Applying for Leave
To apply for leave:
- Click on the “+ Apply for Leave” button at the top right corner.
- Select the Leave Type (e.g., Annual Leave, Medical Leave).
- Choose the Start Date and End Date.
- Enter your Reason for Leave in the text box.
- Click Submit to send the request for approval.
Once submitted, your leave will appear in the table with a Pending status until your manager or HR takes action.
3. Leave Status
Each leave request shows a real-time status indicator:
- Pending – Waiting for manager/HR approval.
- Approved – Leave has been approved.
- Rejected – Leave has been declined.
- Cancelled – Leave request has been withdrawn by the employee.
Tip: You can cancel a pending leave before it is approved using the red X under the Action column.
4. Editing or Cancelling Leave
If you need to cancel a pending request:
- Go to the My Leaves page.
- Locate the request under the Status column showing Pending.
- Click the red X icon in the Action column.
- Confirm cancellation.
Once cancelled, the status will change to Cancelled automatically.
5. Viewing Leave Balances
Your remaining balance updates automatically after HR approval. Balances are shown in real-time within each leave type box.
If you notice discrepancies, contact HR through the Message Board.


